An Easy Half-Up Twist for Keeping Front Sections Back
A half-up twist changes the outline around the face while leaving most of the hair down. Instead of collecting the entire top half into a large bundle, this version uses a modest section from each side. The two twists meet behind the head and fasten together. That makes the style useful for layered lengths that do not reach a low ponytail, provided the selected front sections can travel back comfortably. The result can be tidy, textured or deliberately soft; the construction stays the same.
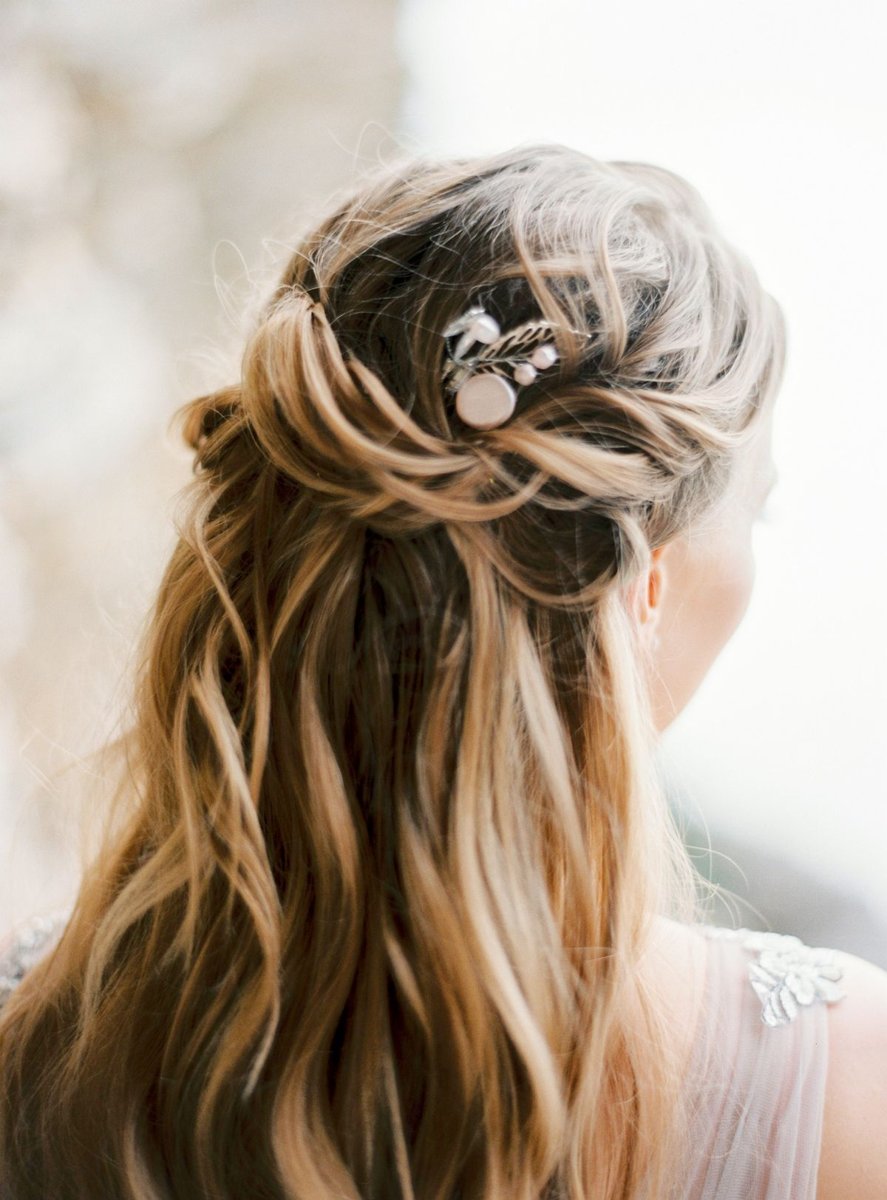
Photo: Eugenia Remark · Photo license. Hairstyle reference photograph; follow the written steps and adapt to your length and texture. The pictured person is not an author or endorser.
Best suited to: Best starting point: front sections long enough to meet behind the head without tension. Suitable shapes vary with layers and density.
What you need
- A small covered elastic or a lightweight closing clip
- A comb tail or fingers for sectioning
- A second mirror to check where the twists meet
Step by step
- Choose your part and arrange the hair you want to keep around the face. Separate a small section near one temple. Follow its natural direction rather than drawing a wide, tight diagonal from the hairline.
- Hold that section away from the rest of the hair and twist it loosely away from the face. Rotate the section as a bundle; do not keep adding hair from the scalp. Two or three turns may be enough on shorter lengths.
- Bring the twist toward the back of the head and temporarily hold it with a clip or your fingers. Aim for a meeting point below the crown, not so high that the front section has to stretch upward.
- Repeat on the other side with a section of a similar visual size. Exact strand counts do not matter. A side part may leave more hair on one side, so choose a smaller portion there if you want balanced twists.
- Join the two twisted ends at the meeting point and secure them together with the elastic. Alternatively, use a clip that closes around both ends without forcing the jaws. Do not include a large quantity of loose lower hair by accident.
- Release your hands and inspect the line from each temple to the fastening. If one side feels tighter, undo and reposition it. Pulling on the looser side to match a tight one simply creates two uncomfortable sections.
- Arrange the remaining lengths beneath the fastening. Check that no clip edge catches when you turn your head. When removing the style, open the clip or elastic first, then unwind each twist gently instead of combing through it while it is still fastened.
Decide how much hair to include
A narrow section produces a subtle detail and leaves more volume around the sides. A wider section makes a clearer half-up silhouette, but it also needs more length to reach the back. Start small, especially when the front is layered. For curls, you can select existing curl groups rather than splitting each one into tiny strands. For dense hair, check that the fastening is designed for the combined bundle. A small decorative clip may hold only the ends of two fine twists, not two thick sections.
Troubleshoot unequal twists
The two sides may look different because of the part, growth direction or haircut. Match the amount of visible twist rather than trying to make both sections identical in length. If one twist collapses, make fewer rotations and place the fastening closer to where it naturally reaches. If the fastening sinks into the lower hair, lift that lower layer away while joining the ends. A second mirror is useful here: the goal is two deliberate paths meeting at one point, without an accidental loop of unrelated hair trapped underneath.
Choose the finishing point
A lower meeting point usually keeps the style soft and leaves the crown alone. A slightly higher meeting point can lift the outline, but only if both sections reach easily. Try the style before adding a high collar or scarf, since those can push the loose lower lengths into the fastening. This is a small daywear arrangement, not a method for keeping hair secure during contact sports or around machinery. If you need all lengths fully contained for work, choose a suitable complete updo instead of relying on a half-up style.
Your quick checklist
- Both sections reach the meeting point naturally.
- The lower hair is not accidentally caught.
- The fastening supports the actual bundle size.
- Both temples feel equally relaxed.
Common questions
Is it a rope braid?
No. Here each side is twisted as one bundle and then secured. A rope braid uses two sections twisted and wrapped together in a different construction.
Can I do this with bangs?
Yes, if you leave the bangs out and select sections behind them. Trying to stretch short bangs into the twists is unnecessary.
What if my hair is too short to meet at the back?
Secure each twist separately near the side instead, or use the bob side-pin tutorial. Do not make the sections tighter to gain reach.